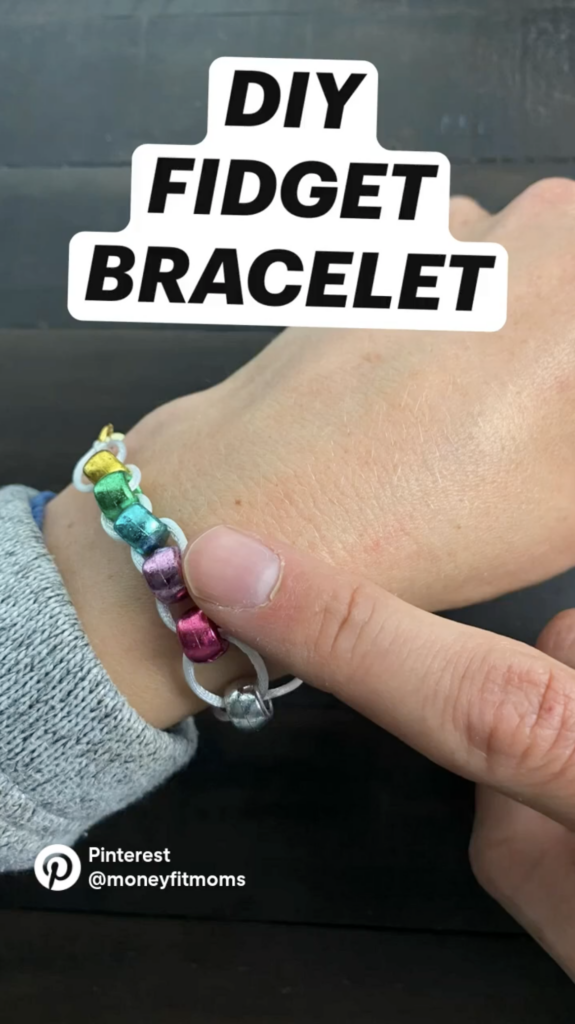
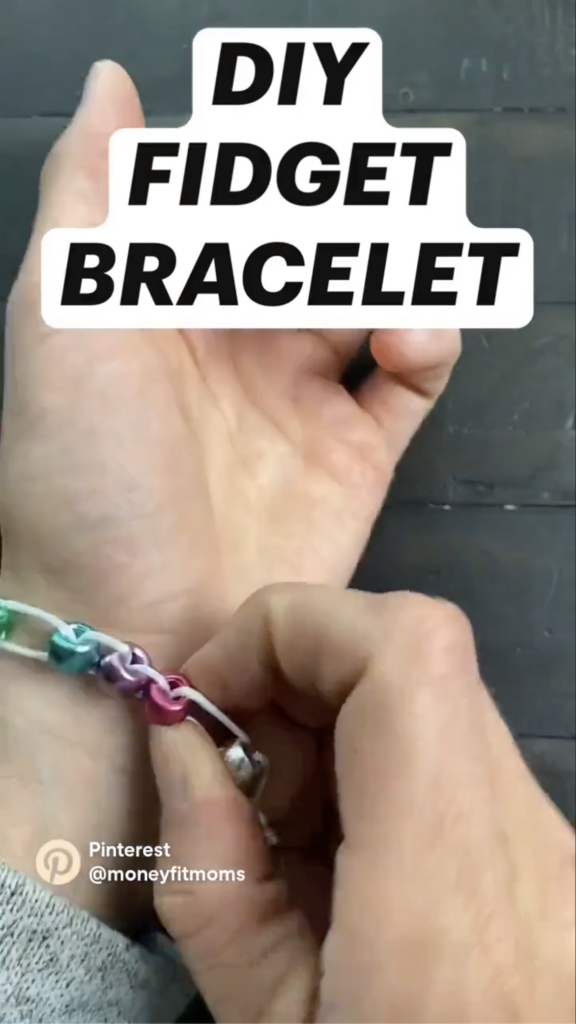
Are you eager to create a personalized DIY fidget bracelet? Look no further! In this comprehensive step-by-step tutorial, we will guide you through the process of making your very own DIY fidget bracelet. This trendy and interactive accessory not only adds a touch of style to your outfit but also provides a calming and stress-relieving experience. So, let’s grab our supplies and follow this super-easy step-by-step tutorial. Get your creative juices flowing and let’s get started!
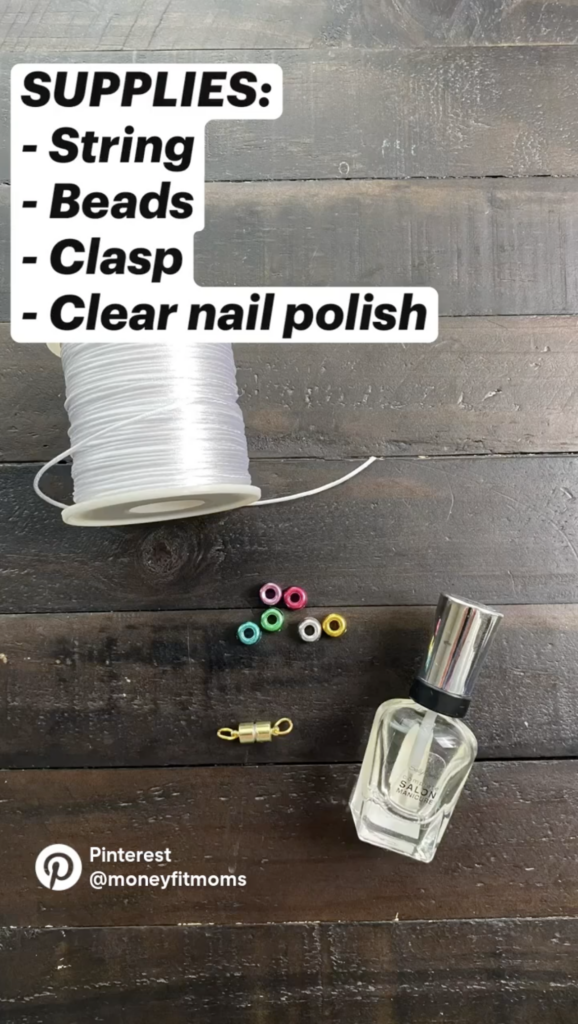
Step 1: Gather Your Supplies for a DIY Fidget Bracelet
Materials Needed for DIY Fidget Bracelet:
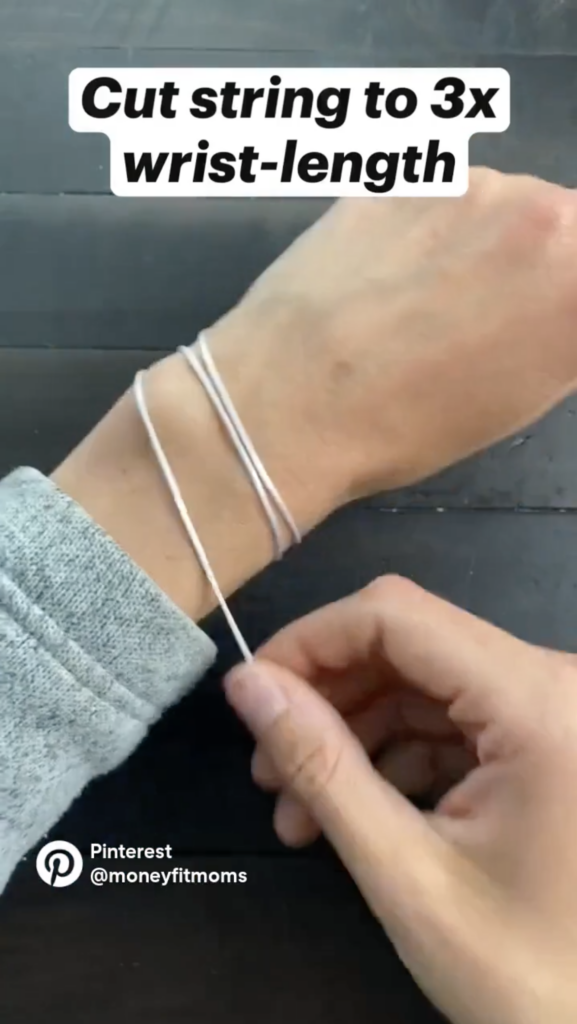
Step 2: Cut the Nylon String to 3x Wrist-Length
Grab that nylon string and cut it to a length that’s about three times the size of your wrist. This will give us enough room to work with and ensure a perfect fit for your bracelet.
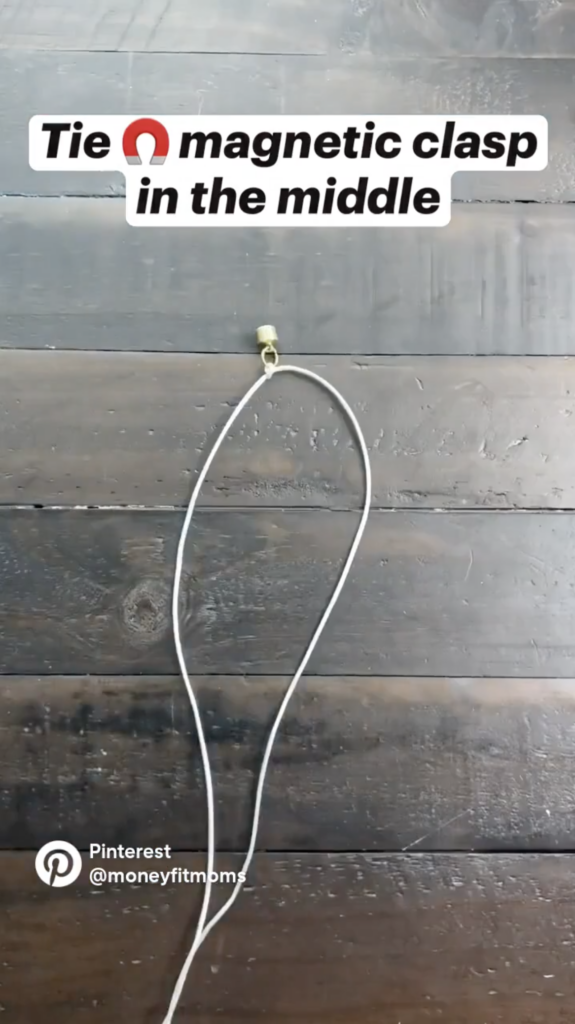
Step 3: Tie the Magnetic Clasp at the Center
Locate the middle point of the nylon string and thread it through one end of the magnetic clasp. Ensure a secure knot to keep the clasp firmly in place. This knot serves as the centerpiece of your DIY fidget bracelet.
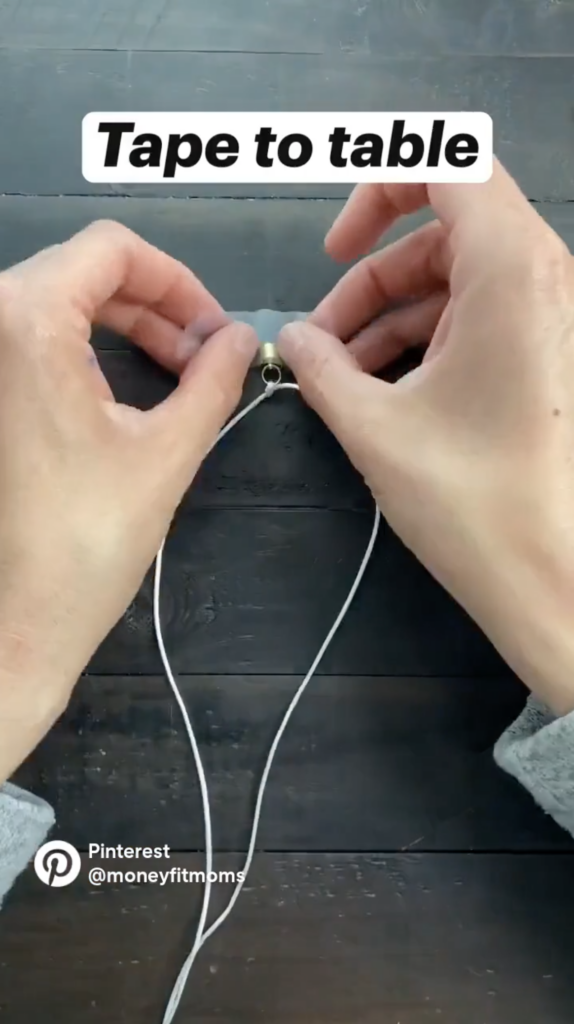
Step 4: Tape the Clasp to Your Work Surface
To make things easier, tape the clasp securely to your work surface. This will keep it in place while we work our crafty magic.
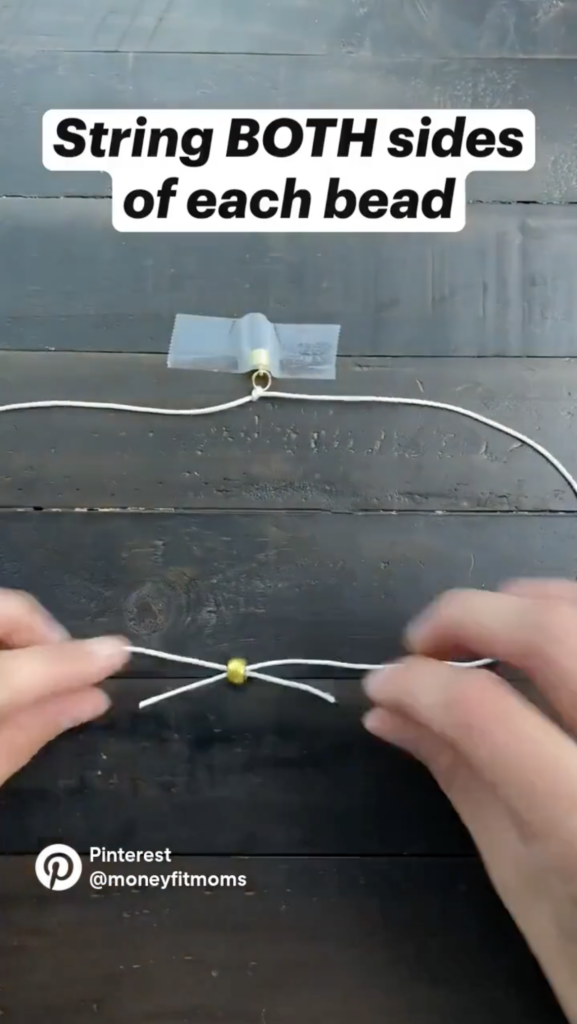
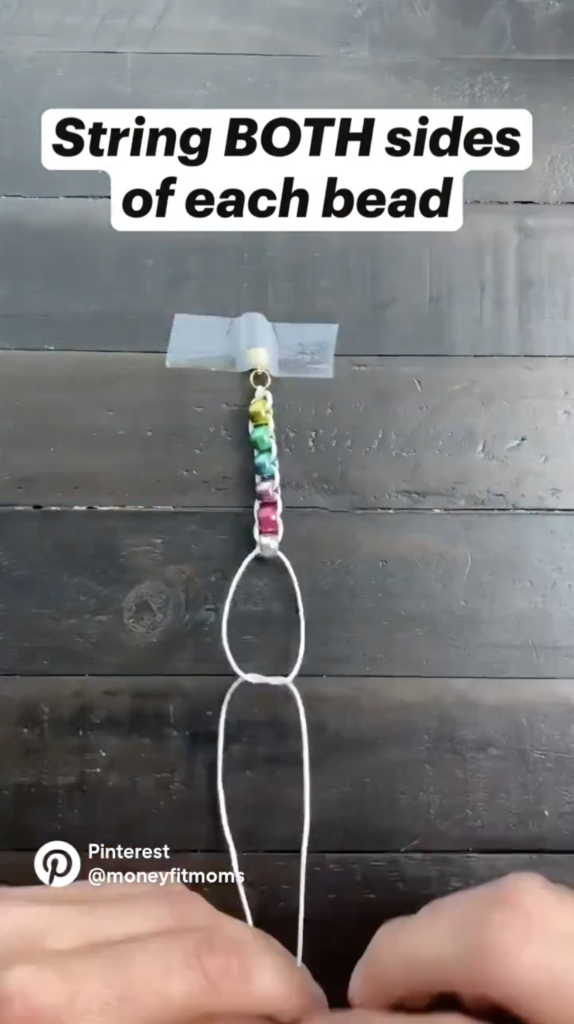
Step 5: Thread Both String Ends through Each Bead
Now comes the fun part—beads! Start threading both ends of the string through each pony bead. Keep going until you’ve reached your desired bracelet length. Mix and match colors to create a unique design that reflects your style.
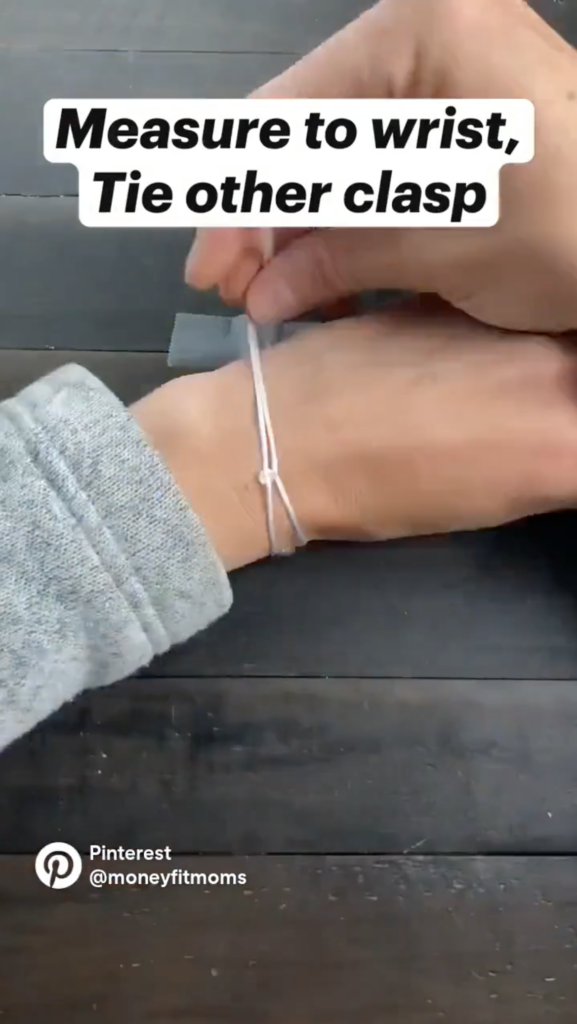
Step 6: Measure the Bracelet to Your Wrist and Tie the Other Clasp
Wrap the bracelet around your wrist and adjust the length until it feels just right. When you’re happy with the fit, thread both string ends through the other end of the magnetic clasp and tie a secure knot. Double-check that everything is snug and secure.
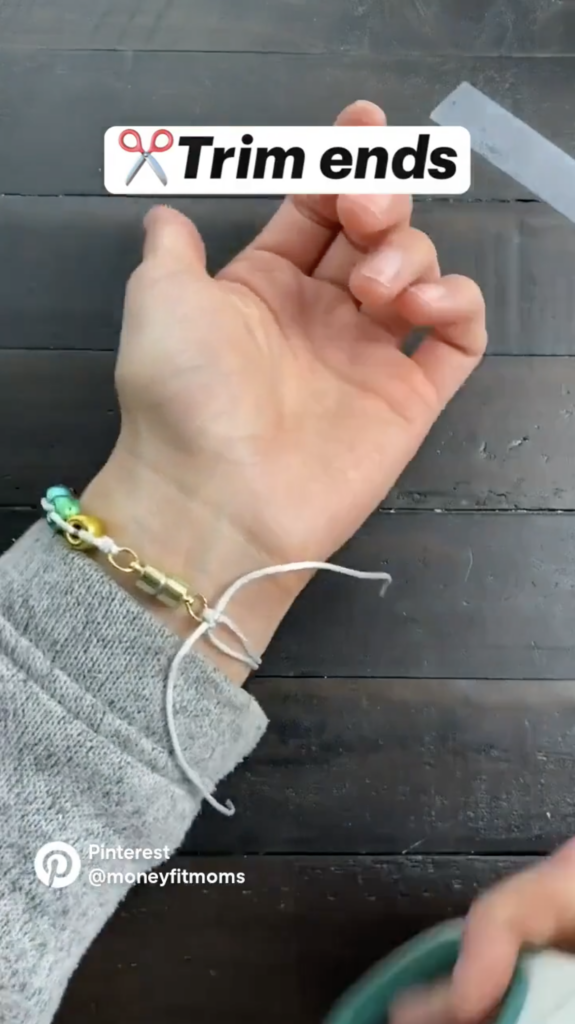
Step 7: Trim the Excess Ends
Grab your trusty scissors and carefully trim any excess string from both ends of the bracelet. Just be careful not to cut too close to the knots, or we’ll risk unraveling our hard work. Trim with precision and tidiness.
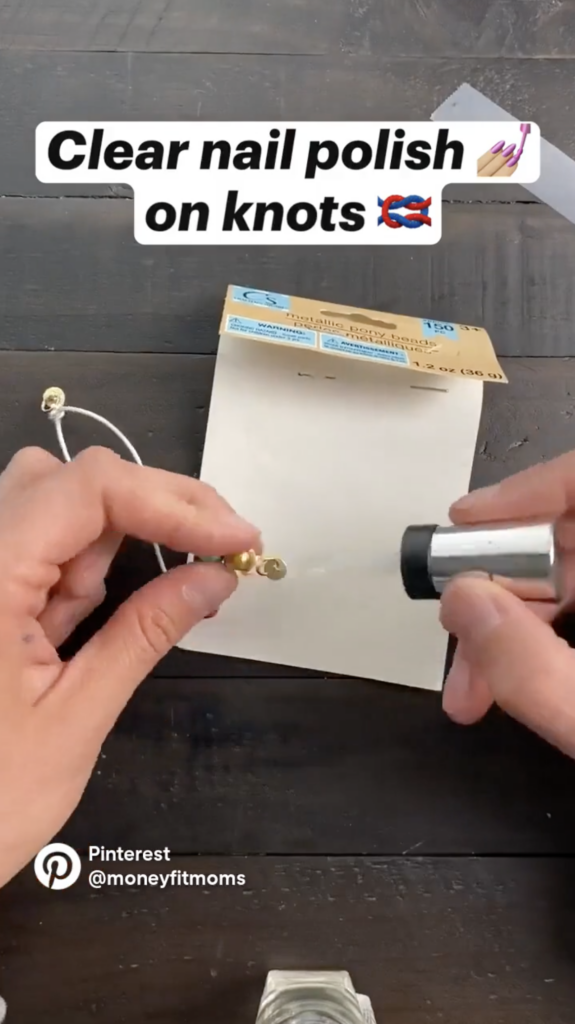
Step 8: Strengthen the Knots with Clear Nail Polish
To reinforce the knots and add some durability, apply a small amount of clear nail polish to each knot. This will keep everything in place and prevent any unwanted unraveling.
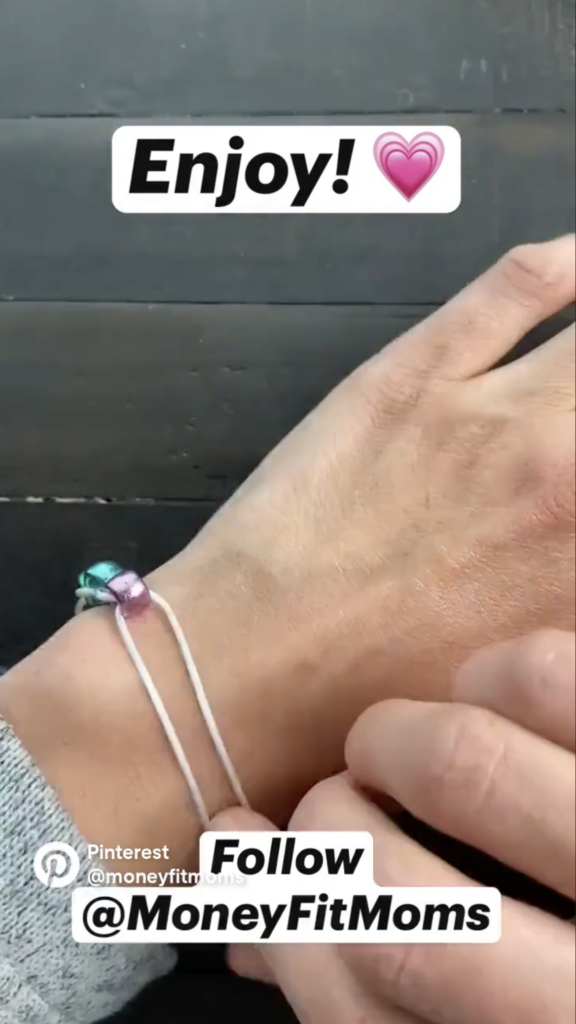
Step 9: Enjoy Your Handmade DIY Fidget Bracelet
Congratulations! You’ve made your very own fidget bracelet. Slip it on and enjoy the soothing and interactive experience it offers. Whether you keep it for yourself or gift it to a friend, your handmade creation is sure to bring joy and relaxation. Show off your crafty skills and rock that fidget bracelet with pride!
Creating a DIY fidget bracelet is a delightful and fulfilling experience. With just a few simple steps, you can make a stylish accessory that keeps your hands busy and adds a touch of personal flair. So gather your supplies, follow this easy tutorial, and let your creativity shine. Get ready to enjoy the calming effects of your own handmade fidget bracelet. Happy crafting!